Showing posts with label black and white. Show all posts
Showing posts with label black and white. Show all posts
Wednesday, 22 May 2013
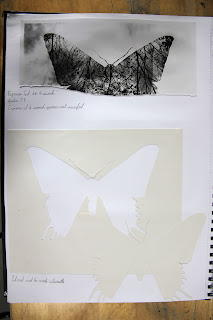
Sketchbook - Photo play stencils
I've the idea of creating stencils of different types of insects and bugs and placing them on photo paper while exposing. These pages present my testers for this technique.
Tuesday, 6 November 2012
Abstract Photography - Favourite Image
This is my favourite image of all my film. I rushed to do it as I was working through lunch (I'd much prefer to have a 3 hour photography session than 2 hours as I feel we don't have enough time), and did not set the exposure long enough. I have every intention of developing an improvement of this photo, and to develop more from this particular film.
For this particular image, I gathered as many fallen apples as I could find. When I had a few dozen, I selected one that had barely any damage, one with a little bruising, one with a little decomposition, and one that had nearly decomposed completely. I set them in a row and awaited the sun to set just enough to allow the shadowing in the decomposing apples to show depth in the apples.
For this particular image, I gathered as many fallen apples as I could find. When I had a few dozen, I selected one that had barely any damage, one with a little bruising, one with a little decomposition, and one that had nearly decomposed completely. I set them in a row and awaited the sun to set just enough to allow the shadowing in the decomposing apples to show depth in the apples.
Abstract Photography - Final Print Improved
I set my final print for a longer exposure, and I'm a lot happier with the outcome. Just to clarify, I blurred the focus on a muddy puddle, and I feel it is one of the most abstract things I've done through this project.
Abstract Photography - Final Print
I'm not happy with how my final print turned out. When thinking about the exposure time, I feel it should have been longer. To make certain I have the detail I want, I will also give more contrast. Putting the contrast up should improve the light and dark areas without effecting each other.
Photography - Final Print Tests
The same thing happened here as the contact sheet tests. I must remember to open the aperture before exposing. The lines where the second image gradually gets lighter shows the estimated exposure time. The darkest is at 20 seconds, counting down in 2 second bursts to 4 seconds being the lightest.
Contact Sheet Tests
These were the two tests I had done before my final contact sheet. The first contact sheet test was much too dark. I set my aperture on the exposure unit to 5.6, and the second time round it was successful. The exposure times ranged between 4 and 16 seconds, 2 seconds added per interval. I chose the time that looked right, being 8 seconds, and exposed my final contact sheet at 8 seconds.
Abstract Photography - Contact Sheet
The most successful of my films for Photography. Each image represents abstract whether it is a pattern, shape, use of tone or shadowing. Every image was closely thought about before taking, and there are some that are better than others. I've developed of a few of the images I thought to be best, and will post/write about them in the upcoming months when I have completed my photography brief.
Tuesday, 23 October 2012
Monochrome Spherical Shapes
Using the same technique as my last post, I changed my material. Instead of using water colour paints, I used charcoal. This gave the image a monochrome effect. This worked better in comparison to my other spherical shapes. I was disappointed that colours from the opposite page had rubbed off on to this drawing.
Tuesday, 2 October 2012
Peach Rose
Personal photography. I edited this image in photoshop so that the attention would be completely drawn to the strong colour of the rose. This is my favourite effect when using photoshop.
Wednesday, 26 September 2012
Chocolate in Chocolate
Smarties emptied in to an Italian hot chocolate. I did the same thing with this image I had done in the previous post. I was much happier with this outcome as opposed to the Venetian Mask, in this image, to me it feels as though you can reach in and grab the beverage.
Venetian Mask
Venetian Mask purchased from Venice, Italy. I wanted focus to be set on my eyes, but instead of enhancing the colour, I copied the image in to a layer on top of the original. I set the new layer to black and white, and then I used the rubber tool to erase around the eyes. This revealed the coloured image underneath, leaving the final outcome above.
Subscribe to:
Posts (Atom)


.jpg)